Closet Decor
This week I've put together a small tutorial for you :)! This tutorial doesn't require very many materials but it does require you to have some sort of a wardrobe/closet system. I'm not too sure what this sort of system is called but its sort of like a peg board, where you can create your own shelves and closet sections using the holes on the side of your closet and little wooden pegs. Most of the closets that I have used have used a similar system, but if for some reason yours is different, this tutorial will also work on peg boards or bookshelves with similar systems.
The wardrobe that I am using in this tutorial is the Ikea PAX Wardrobe.

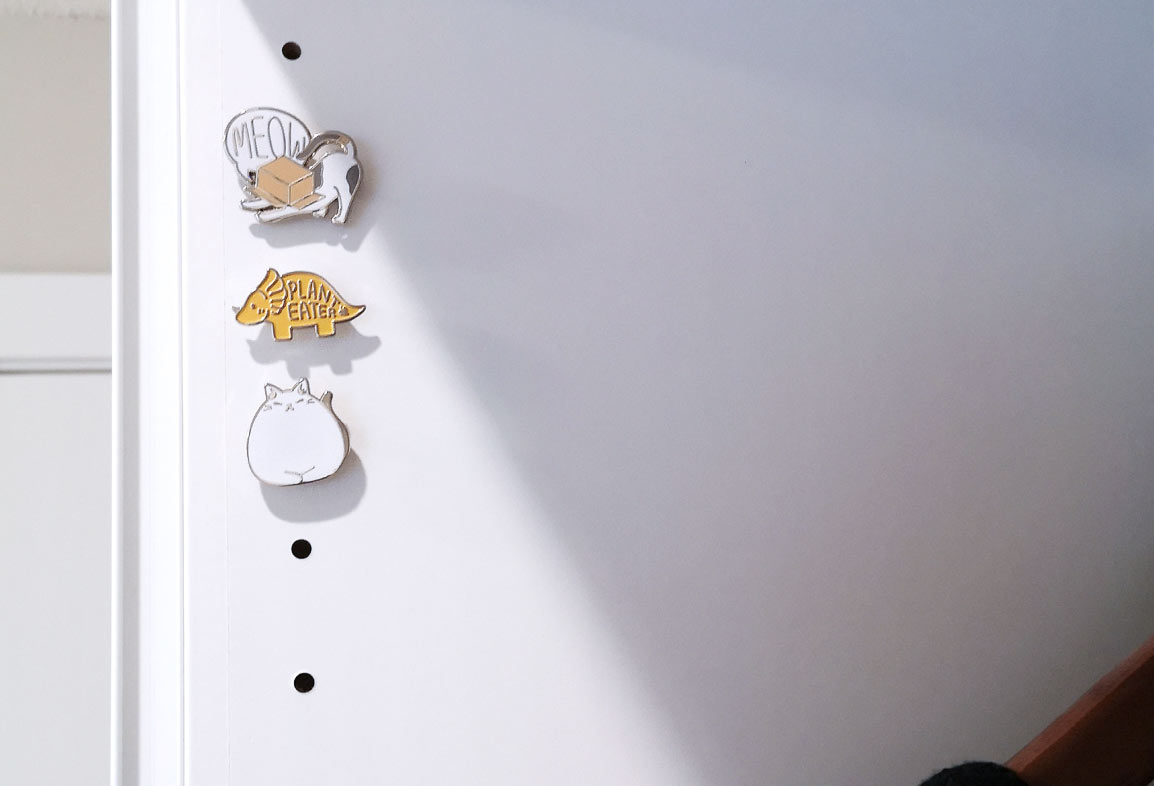
In this little tutorial, I'll be sharing with you how I embellish my closets with pins! In these types of closet systems there tends to be a lot of holes that are unused. Unless you decide to change how your closet is sectioned, these holes don't really serve a purpose. If you're an enamel pin collector like me who needs a place to display and store your pins, or perhaps you're just looking to make your closet a little bit more fun and personalized, here's how I created this look:

First you'll need a few things:
- a ruler
- a 3mm thick foam core board (I find that these are cheapest at Dollar Tree)
(You only need a little bit, about 5mm x 3cm per pin)
- a pencil
- a utility knife
- a cutting mat
- a pair of scissors (optional)
- a pin of your choice! (Only the ones with a single pin post though!)
Pro Tip: When you're using a utility knife, it's better to use a metal ruler rather than a plastic one so you don't create dents on your straight edge.

Next you'll be cutting your foam core board. This is going to act as a "stopper" to hold your pin in place. Since I only need a little bit, I found a small piece I had laying around in my crafting scraps and cut from that. If you have a larger piece, I recommend cutting it into a piece about the size of your hand or smaller so that it's easier to handle (The piece I was working with was about 1"x1", it's kind of hidden under the ruler). From there you'll want to cut a small strip that is 3mm wide. This way when you're looking at your piece from the side, it forms a small square.
Pro Tip: Since what we are cutting is quite small, I recommend cutting with a utility knife and ruler here so that you don't squish your foam. If you make a mistake or squish it by accident, no fret, you actually won't be able to see the foam, but I do think that it will function better if it maintains its shape. If you don't have a utility knife, a scissor should still work. There is a higher chance of your foam piece getting squished, but as long as the scissor is sharp enough, it should be fine.
Once you have your small strip ready, put it into one of the holes. If your closet or shelf is from Ikea I believe it should fit perfectly like mine does*. You'll want to push the strip in as far as it will go, and mark the spot where your foam meets the edge of the closet.
*If for some reason your opening is bigger or smaller, cut another piece and adjust as you see fit.

Remove the foam from your closet, keeping in mind which side was in, and which side was out. On the side that was "out" trim the foam about 3-5 mm away from the line you marked with your pencil. This extra bit of foam will stick out of your closet and will give you something to hold onto if you decide to remove it from your closet. The foam will mostly be covered by the pin so it won't be visible once you are done.
Pro Tip: Since this part is quite small and difficult to cut with a knife unless your knife is very sharp, if you find that you're having trouble you can cut this part with a sharp scissor.

On the side you just cut, align your pin with the center of the foam piece and insert. When you're done your pin post should be fully inserted into the foam.

Now you're all ready for decorating! Simply take your little creation over to you closet and place it into any of the empty holes to start decorating. I have mine on the top corner of my closet, but you can definitely fill up the column if you like!
Pro Tip: Your foam piece should have 2 smooth edges and 2 rough spongey edges. By ensuring that the smooth side is facing out it allows your foam piece to blend in with your closet, making your pin seem like it's an actual attachment for your furniture! (If your closet/shelf is black, try going with a black piece of foam core!)
Fun Ideas:
- Display pins with similar themes together, perhaps all pins related to fashion on one side of your closet, and pins related to hobbies on the other.
- Instead of filling up an entire column you can also space out the pins in different ways to create your own layout!
- Create a rainbow or gradient by organizing pins by color.
- If you're decorating a book shelf, try finding pins related to some of your favorite books for those specific shelves!
.
What I love about displaying pins this way is that it is in my own personal space. When I closet the door to my wardrobe it doesn't intrude upon the shared space I have with my husband which allows me to have full reign in regards to the design of it all. It doesn't interfere with any of the decor that we already have around the rest of our space and makes an otherwise boring closet look much more exciting.
What I also love is that when I decorate my closet with all the little things I've collected, I can see them everyday and it just makes me so happy :). You'll definitely see more of my closet in future posts, I've got so many more ideas in here.


Leave a comment
This site is protected by hCaptcha and the hCaptcha Privacy Policy and Terms of Service apply.